
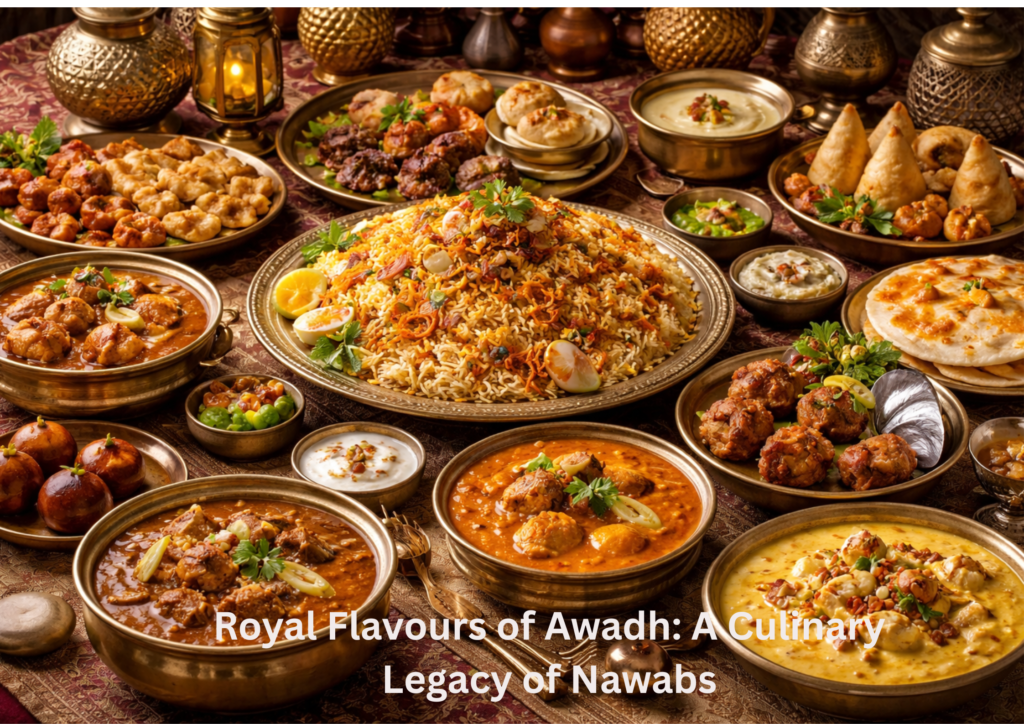
Welcome to the World of Awadi Cuisine: A Royal Culinary Legacy
Imagine stepping into the grand courts of 18th-century Lucknow, where fragrant biryanis simmer in sealed vessels, and complex curries have been perfected over generations. This is the enchanting world of Awadi cuisine—one of India’s most refined and historically rich culinary traditions, born from the opulence of the Nawabi courts and the diverse cultures that once thrived in the heart of what is now Uttar Pradesh.
Awadi cuisine, pronounced ah-wah-dee, hails from the Awadh region (the former kingdom of Oudh), with Lucknow as its gastronomic capital. This isn’t just everyday food—it’s a living legacy of royalty, perfected palates, and culinary artistry that has survived centuries. The dishes you’ll discover here represent far more than recipes; they embody a philosophy of cooking that values patience, precision, and the transformation of simple ingredients into extraordinary flavors.
What makes Awadi cuisine truly special? It’s a fascinating blend of Persian, Mughal, and Indian influences, refined in the royal kitchens of the Nawabs. Unlike many Indian cuisines that embrace bold, immediate flavors, Awadi cooking is sophisticated and subtle—it builds layers of taste that unfold slowly on your palate. The use of aromatic spices like mace, cardamom, and saffron; slow-cooking techniques; and an emphasis on cooking meat and rice together in dishes like biryani set it apart from other regional Indian foods.
A Culinary Journey Through Time
Awadi cuisine reached its zenith during the reign of Nawab Asaf-ud-Daula (1775-1797) when Lucknow became the center of Indo-Islamic culture and culinary innovation. The Nawabs’ kitchens employed master chefs who experimented relentlessly, creating dishes that remain unmatched in their complexity and elegance. Though the Nawabi courts are now history, their culinary innovations live on in homes, restaurants, and the hearts of those who cherish this gastronomic treasure.
Today, as global food culture celebrates Indian cuisine, Awadi food deserves its moment in the spotlight. It’s a cuisine that rewards patience and attention to detail, where cooking is meditation, and every dish tells a story of love, tradition, and artistic vision.
Philosophy & Heritage
Awadhi cooking emerged from the Mughal courts blended with local Lucknowi traditions. The cuisine emphasizes:
- Subtlety over intensity – Complex, layered flavors rather than overpowering spice heat
- Time investment – Dishes take 2-4 hours to develop proper depth
- Precision and care – Every ingredient serves a purpose in flavor architecture
- Aromatics and fragrance – Saffron, cardamom, rose water, and kewra are prized
Core Techniques
1. Dum Pukht (Steam Cooking)
How it works:
- Ingredients are layered in a heavy-bottomed pot (handi)
- The lid is sealed with dough to trap steam completely
- Heat is applied to create steam pressure
- Cooking happens entirely in this sealed environment
- No stirring or checking during cooking
Why it’s revolutionary:
- Creates an enclosed microclimate that intensifies flavors
- Meat becomes incredibly tender from steam pressure
- Spices infuse deeply into every ingredient
- Natural juices of ingredients cook them from within
- No evaporation means concentrated, rich taste
- Aromatic compounds (saffron, cardamom) stay trapped in the pot
Temperature control:
- High heat for 2 minutes to create initial steam
- Low heat for 45 minutes to 1.5 hours for actual cooking
- Heat from all sides (often done on charcoal or open flame)
2. Layering of Ingredients
Now I’ll create a visually striking infographic showing the Awadi biryani layering principle: This infographic visualizes the fundamental layering principle that makes Awadi biryani (and other Awadi dishes) so distinctive. Here’s why each layer matters:
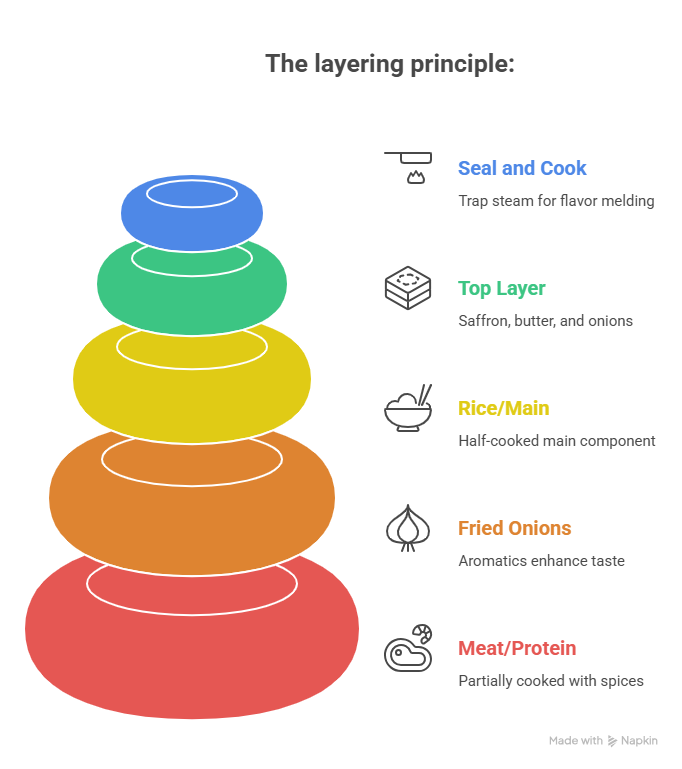
Why the layering sequence is critical:
Bottom Layer (Meat): Starting with partially cooked meat allows the spices to penetrate deeply. The meat’s flavors form the foundation that will gradually permeate upward through the layers as steam rises during cooking.
Fried Onions & Aromatics: These create golden pockets of flavor and aroma. The crispy texture contrasts beautifully with the soft rice, while the aromatics (mint, cilantro, sometimes rose petals) infuse their fragrance throughout the dish during the sealed cooking.
Rice Layers: The half-cooked rice will complete its cooking using residual heat and the moisture from the meat. By placing denser, more flavorful components below, the rice absorbs flavors from beneath rather than absorbing them uniformly—creating pockets of varying intensity.
Saffron & Butter (Top): Placed at the top, saffron milk and butter slowly seep downward, creating streaks of golden color and luxurious richness. This is why you’ll see beautiful saffron threads throughout an authentic biryani.
The Seal: This is absolutely essential. Sealing with dough (called dum pukht cooking) traps all the steam inside, creating a closed ecosystem where flavors can’t escape and moisture can’t enter. The layers essentially cook together as one unified dish.
The magic happens during the seal: As the pot heats gently, moisture rises from the meat layer, passes through the rice, and condenses on the sealed top—creating a cycle where flavors move through every layer multiple times over 45-60 minutes.
Why layering matters:
- Each layer absorbs flavors from adjacent layers
- Creates different taste notes at each stage of eating
- The bottom layer gets most concentrated spice absorption
- The top layer stays fragrant with delicate flavors
- Cross-flavoring between layers creates complexity
Example in Biryani:
- Marinated meat at bottom absorbs spices deeply
- Fried onions in middle create sweetness and texture contrast
- Rice in middle absorbs meat juices
- Saffron rice on top stays visually stunning and aromatic
3. Spice Blooming in Fat
The foundational technique used in almost every Awadhi dish.
Process:
- Heat ghee or clarified butter to medium temperature
- Add whole spices (cardamom, cinnamon, bay leaves, cloves)
- Wait 1-2 minutes for spices to release their essential oils
- This “blooming” makes spices aromatic without burning them
- The ghee becomes infused with spice essence
Critical control:
- Never burn spices – they become bitter
- Keep temperature medium, not high
- Listen for the sizzle – it indicates proper temperature
- Stop when fragrant (2-3 minutes max)
- Remove from heat immediately after adding next ingredient
Why this matters:
- Bloomed spices release volatile oils that flavor the entire dish
- Raw spice particles taste harsh; bloomed spices taste refined
- The fat carries spice flavor to all other ingredients
- This technique separates royal cuisine from everyday cooking
4. Building a Flavor Base (Tadka)
Creating the aromatic foundation before main cooking begins.
Standard Awadhi tadka:
- Slice onions very thinly
- Fry in ghee until deep golden brown (not burnt)
- Add ginger-garlic paste – cook 2-3 minutes until raw smell disappears
- Add yogurt slowly – it will sizzle and reduce slightly
- Add green chilies and salt
- Let this mixture rest for 2 minutes
Why this base is essential:
- Onions provide sweetness and depth
- Ginger-garlic adds pungency and medicinal warmth
- Yogurt brings creaminess and slight tang
- This base carries all flavors into the main ingredients
- Takes 15-20 minutes but creates the foundation of taste
5. Slow Cooking on Low Heat
The “low and slow” method that defines Awadhi cooking.
Temperature management:
- Initial high heat: 2-3 minutes to create steam (if using dum)
- Main cooking: LOW heat only
- Simmer, never boil
- Total cooking time: 1.5-4 hours depending on ingredient
- Meat gets more tender the longer it cooks (up to a point)
What happens during slow cooking:
- Collagen in meat converts to gelatin (creates silky texture)
- Flavors meld and deepen
- Spices’ harsh edges soften and round out
- Natural juices concentrate instead of evaporating
- Proteins break down partially for easier digestion
Temperature ranges:
- High heat for blooming spices: 180-200°C
- Simmering for gravies: 80-100°C (barely a bubble)
Dum cooking: High 2 min then 70-80°C for 45-60 minutes
6. Tempering & Finishing Touches
The art of completing a dish with maximum impact.
Techniques:
- Fried onion garnish: Adds crunch, sweetness, and visual appeal
- Ginger julienne: Raw ginger on top provides sharp flavor contrast
- Fresh herbs: Coriander and mint added last preserve their freshness
- Boiled eggs: Added to biryani as protein and richness boost
- Saffron-soaked milk drizzle: Poured over biryani at the end for aroma
Timing is crucial:
- Fried onions go on at the very last moment (lose crispness in minutes)
- Fresh herbs shouldn’t be cooked (lose chlorophyll and aroma)
- Ghee drizzle should still be warm for best absorption
- Serve immediately after garnishing
10 AUTHENTIC AWADHI RECIPES FROM LUCKNOW
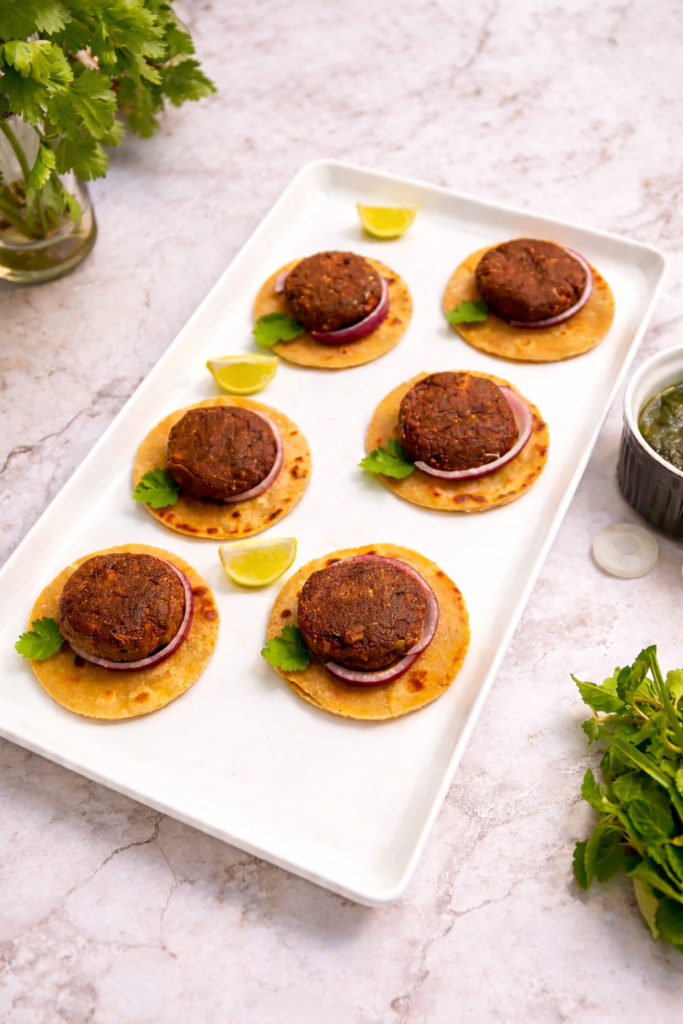
GALOUTI KEBAB (TUNDAY KEBAB) – THE MELT-IN-MOUTH MARVEL
History & Significance
In the 17th century, a toothless Nawab of Lucknow wanted to enjoy meat but could no longer chew. His royal chefs created this legendary kebab made from finely minced meat and spices. A one-armed chef named Murad won the competition, and the dish became known as “Tunde ke Kebab.”
Ingredients (Serves 4-6)
- 500g minced lamb or mutton
- 2 cups onions (finely minced)
- 3 tbsp ginger-garlic paste
- 4 green chilies (finely chopped)
- 2 tbsp raw papaya paste (meat tenderizer)
- 1 egg yolk
- 0.5 tbsp garam masala powder
- 0.5 tbsp coriander powder
- 0.25 tbsp cumin powder
- 0.25 tsp black pepper powder
- 2 pinches mace powder
- 3 pinches cardamom powder
- 2 pinches cinnamon powder
- 2 pinches clove powder
- 1 pinch nutmeg powder
- 2 tbsp poppy seeds (khus khus) – powdered
- 2 tbsp cashew paste
- 1 tsp salt
- 2 tbsp mint leaves (finely chopped)
- 2 tbsp coriander leaves (finely chopped)
- 4 tbsp ghee or oil (for frying)
Method
Step 1: Prepare the Onion Base (20 minutes)
- Heat ghee in a pan and fry minced onions until deeply golden brown (not burnt)
- Remove, cool slightly, and grind into a smooth paste with ginger-garlic paste, green chilies, and raw papaya paste
- The papaya naturally tenderizes the meat fibers – this is the secret to the kebab’s softness
Step 2: Toast the Spices (5 minutes)
- In a dry pan, lightly toast poppy seeds and cashew paste separately (or together)
- In another pan, toast whole cardamom, cinnamon, cloves, and nutmeg for 2-3 minutes until fragrant
- Grind everything to a fine powder
- This complex spice blend is what defines an authentic galouti
Step 3: Mix the Meat (5 minutes)
- In a large bowl, combine minced meat with the fried onion paste
- Add all toasted spice powders: garam masala, coriander, cumin, black pepper, mace, cardamom, cinnamon, clove, nutmeg
- Add egg yolk for binding
- Mix thoroughly but gently – do not overwork
Step 4: Finalize the Mixture (5 minutes)
- Add mint and coriander leaves
- Season with salt
- The mixture should be fine and pasty, not chunky
Step 5: Rest (30-60 minutes)
- Cover and refrigerate for 30 minutes to 1 hour
- This helps spices infuse and makes the meat easier to shape
Step 6: Shape the Kebabs (15 minutes)
- Wet your palms with water
- Take 2 tbsp mixture at a time and gently shape into round, flat patties (2-3 cm thick)
- Handle gently – the patties should be soft and delicate
- Makes 12-16 kebabs
Step 7: Cook on the Tawa (10 minutes)
- Heat a heavy cast-iron tawa (flat pan) on medium-high heat
- Add ghee and let it get smoking hot
- Carefully place patties on the hot tawa
- Fry for 3-4 minutes on each side until golden brown with charred spots
- The outside should be crispy, inside incredibly soft
Serving Suggestion
Serve immediately with Ulte Tawe ka Paratha, sliced onions, lemon wedges, and mint chutney. The kebab should melt in your mouth like butter.
Pro Tips
- Don’t skip the papaya paste – it’s essential for tenderness
- Toast all spices fresh for maximum aroma
- Fry on a tawa (flat pan), not in deep oil – this is authentic
- Serve hot and immediately
KAKORI KEBAB – THE ROYAL GRILLED DELIGHT

Ingredients (Serves 4-6)
- 600g minced lamb or mutton
- 3 tbsp ghee
- 1.5 cups onions (finely sliced)
- 1 cup yogurt (whisked)
- 3 tbsp ginger-garlic paste
- 2 tbsp raw papaya paste
- 2 eggs
- 3 tbsp cashew paste
- 2 tbsp poppy seeds (powdered)
- 4-5 green cardamom pods
- 2-3 black cardamom pods
- 4-5 cloves
- 1 inch cinnamon stick
- 2 bay leaves
- 1 tbsp coriander powder
- 0.5 tbsp cumin powder
- 1 tsp salt
- 0.5 tsp black pepper powder
- 2 tbsp mint leaves (finely chopped)
- Metal skewers
Method
Step 1: Prepare the Paste (20 minutes)
- Fry sliced onions in ghee until golden brown
- Grind with yogurt, ginger-garlic paste, and papaya paste into a smooth paste
- This creates the binding base
Step 2: Spice Infusion (5 minutes)
- Crush cardamom, cloves, and cinnamon pods
- Add to ginger-garlic-onion paste
- Let the spices infuse
Step 3: Mix the Kebab (10 minutes)
- Combine minced meat with the prepared paste
- Add cashew paste, poppy seed powder
- Add eggs for binding
- Add coriander powder, cumin powder, salt, and black pepper
- Mix thoroughly until well combined
- Refrigerate for 1 hour
Step 4: Mold on Skewers (15 minutes)
- Wet your hands
- Take 3-4 tbsp mixture and mold around metal skewers
- Create a cylindrical shape, smooth and even
- Makes 12-16 kebabs
Step 5: Cook Over Charcoal (15 minutes)
- Grill over charcoal or open flame, turning frequently
- Cook until all sides are evenly browned (8-10 minutes)
- Brush lightly with butter while cooking
- The kebab should be cooked through but still tender
Serving Suggestion
Serve hot with mint chutney, sliced onions, and lemon. Pairs beautifully with naan or roomali roti.
Pro Tips
- Use a meat grinder for the finest texture
- The papaya is essential – it keeps the meat tender
- Don’t skip the egg yolk – it’s crucial for binding on the skewer
- Grill slowly over low to medium flame to cook through without drying out
LUCKNOWI AWADHI CHICKEN BIRYANI – THE FRAGRANT MASTERPIECE

Ingredients (Serves 6-8)
- 800g chicken (cut into medium pieces)
- 2 cups basmati rice (soaked for 30 minutes)
- 1 cup yogurt
- 5 tbsp ghee
- 2 cups onions (thinly sliced)
- 3 tbsp ginger-garlic paste
- 2 green cardamom pods
- 2 black cardamom pods
- 4-5 cloves
- 1 inch cinnamon stick
- 2 bay leaves
- 1 tsp cumin seeds
- 0.5 tsp black peppercorns
- 1 tsp coriander powder
- 0.5 tsp cumin powder
- 0.5 tsp red chili powder
- 2 tbsp mint leaves (finely chopped)
- 2 tbsp coriander leaves (finely chopped)
- 10-12 saffron strands (soaked in 0.5 cup warm milk)
- 1.5 tsp salt
- Water for cooking
- 4-5 green chilies
Method
Step 1: Marinate the Chicken (30 minutes)
- Mix yogurt with ginger-garlic paste, 2 tbsp ghee, coriander powder, cumin powder, red chili powder
- Add chopped mint and coriander leaves
- Marinate chicken for at least 30 minutes (or up to 2 hours)
Step 2: Cook the Rice (15 minutes)
- Boil water in a large pot (about 3 liters)
- Add whole spices: green cardamom, black cardamom, cloves, cinnamon, bay leaves, cumin seeds
- When water boils, add soaked basmati rice
- Cook until 70% done (rice should still be slightly firm)
- Drain completely
Step 3: Fry the Onions (15 minutes)
- Heat 2 tbsp ghee in a pan
- Fry sliced onions until golden brown and crispy
- Remove and set aside (keep 2 tbsp for layering)
Step 4: Cook the Chicken (15 minutes)
- Heat 1 tbsp ghee in a heavy-bottomed pot
- Add marinated chicken with the yogurt marinade
- Cook on high heat for 5 minutes
- Cook on medium heat for 8-10 minutes until 80% cooked
- The chicken should not be fully cooked at this stage
Step 5: Layer for Dum Cooking (Preparation)
- Spread half the cooked rice at the bottom of a heavy-bottomed pot (handi)
- Sprinkle 1 tbsp fried onions
- Layer the partially cooked chicken with its gravy
- Top with remaining rice
- Sprinkle remaining fried onions
- Add saffron-soaked milk over the rice
- Dot with remaining ghee
Step 6: Dum Cooking (45-50 minutes)
- Cover the pot with aluminum foil
- Place the lid tightly on top
- For traditional dum cooking, seal the edges with dough (optional)
- Cook on high heat for 2-3 minutes (to create steam)
- Reduce to low heat and cook for 45-50 minutes
- Do not open the lid while cooking
Step 7: Rest and Serve (10 minutes)
- Turn off heat and let rest for 5 minutes with the lid on
- Gently open and fluff with a fork
- Garnish with fried onions and fresh mint
Serving Suggestion
Serve with raita (yogurt), sliced onions, lemon, and pickles. A simple cucumber-tomato salad complements it beautifully.
Pro Tips
- Don’t fully cook the chicken initially – it continues cooking during dum
- Seal the pot properly to trap steam
- Don’t open the lid while cooking – patience is key
- Soak rice properly for even cooking
Fresh herbs make a big difference in final flavor
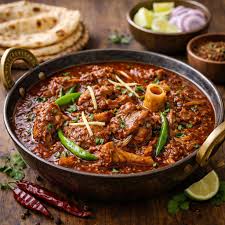
MUTTON NIHARI – THE ROYAL BREAKFAST STEW
History & Significance
Nihari comes from the Arabic word “nahar” (day) because it was traditionally cooked overnight and served after morning prayers. The Nawabs of Lucknow enjoyed this as their royal breakfast. It’s a slow-cooked stew that develops deep, complex flavors.
Ingredients (Serves 6)
- 800g mutton (with bones, cut into medium pieces)
- 1 marrow bone
- 4 tbsp ghee
- 2 cups onions (sliced)
- 4 tbsp ginger-garlic paste
- 2 tbsp ginger (julienned)
- 4-5 green cardamom pods
- 2 black cardamom pods
- 6 cloves
- 2 inch cinnamon stick
- 2 tbsp coriander powder
- 1 tbsp cumin powder
- 1 tsp long pepper (pippali) powder
- 0.5 tsp black pepper powder
- 0.5 tsp red chili powder
- 2 tbsp poppy seeds (powdered)
- 2 tbsp yogurt
- 2 tbsp mint leaves
- Salt to taste
- 1 tbsp lemon juice
- Water (about 1.5 liters)
- Oil for frying
Method
Step 1: Prepare for Cooking (15 minutes)
- Fry half the sliced onions in ghee until golden brown
- Grind with yogurt to create a paste
- Keep remaining raw onions for garnish
Step 2: Cook the Stew – Part 1 (20 minutes)
- Heat remaining ghee in a heavy-bottomed pot
- Add marrow bone and mutton pieces
- Fry on high heat for 5 minutes until edges are sealed
- Add ginger-garlic paste and fry for 3-4 minutes
Step 3: Add Spices (5 minutes)
- Add crushed whole spices: green cardamom, black cardamom, cloves, cinnamon
- Add coriander powder, cumin powder, black pepper powder, long pepper powder
- Add poppy seed powder
- Fry for 2-3 minutes until spices are roasted
Step 4: Add Yogurt Base (5 minutes)
- Add the prepared onion-yogurt paste slowly
- Stir continuously to prevent yogurt from curdling
- Cook on low heat for 3-4 minutes
Step 5: Slow Cook the Nihari (2-3 hours)
- Add water gradually
- Bring to a boil, then reduce to low heat
- Cover and simmer for 2-3 hours until meat is extremely tender
- Stir occasionally
- The gravy should become thick and rich
- Add salt to taste
Step 6: Finishing Touch (5 minutes)
- Add julienned ginger just before serving (adds a fresh bite)
- Add lemon juice
- Add chopped mint leaves
- Adjust seasoning if needed
Serving Suggestion
Traditionally served with khameeri roti or puri. Garnish with fried onions, fresh mint, and julienned ginger. A dollop of ghee on top adds authenticity.
Pro Tips
- Nihari is best made a day ahead and reheated – flavors develop overnight
- Don’t rush the cooking time – slow cooking is essential
- The poppy seed powder gives it the signature Awadhi richness
- Traditionally eaten as breakfast, but it’s good any time of day
- The marrow bone is important – it adds depth to the gravy
MURG MUSALLAM – THE WHOLE SPICED CHICKEN
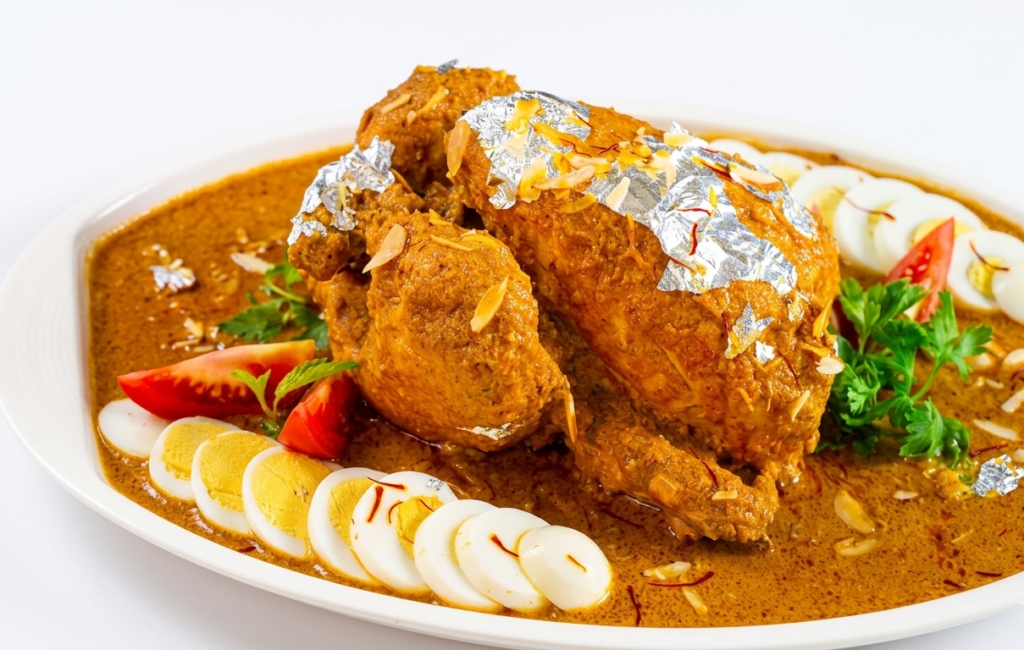
History & Significance
This is one of the oldest Mughal dishes, first recorded in Emperor Akbar’s court. It represents the pinnacle of royal cooking – a whole chicken, marinated in exotic spices and slow-cooked until it becomes incredibly tender.
Ingredients (Serves 6)
- 1 whole chicken (1.5 kg)
- 0.75 cup yogurt
- 5 tbsp ginger-garlic paste
- 3 tbsp ghee
- 2 eggs (beaten)
- 1 cup onions (fried and powdered)
- 0.5 cup cashew paste
- 0.5 cup poppy seed paste
- 4-5 green cardamom pods
- 2 black cardamom pods
- 8-10 cloves
- 2 inch cinnamon stick
- 1 tbsp coriander powder
- 1 tsp cumin powder
- 0.5 tsp black pepper powder
- 0.5 tsp red chili powder
- 1 tsp salt
- 1 tbsp lemon juice
- 2 tbsp mint leaves (finely chopped)
- 2 tbsp coriander leaves (finely chopped)
- 3-4 tbsp ghee (for cooking)
- 1 cup water
Method
Step 1: Prepare the Marinade (30 minutes)
- Mix yogurt with ginger-garlic paste, beaten eggs
- Add fried onion powder, cashew paste, poppy seed paste
- Add coriander powder, cumin powder, black pepper powder, red chili powder
- Add salt, lemon juice, mint and coriander leaves
- Mix everything to a smooth marinade
Step 2: Marinate the Chicken (2-4 hours)
- Make deep slits all over the chicken with a sharp knife
- Apply the marinade generously, making sure it goes into the slits
- Marinate for at least 2-4 hours (overnight is even better)
Step 3: Cook in the Handi (1 hour)
- Heat 3-4 tbsp ghee in a heavy-bottomed, round pot (handi)
- Add crushed cardamom, cloves, and cinnamon sticks
- Let them release their fragrance (30 seconds)
- Carefully place the marinated chicken in the pot
- Add any remaining marinade
- Add water
Step 4: Dum Cooking (45-50 minutes)
- Cover with aluminum foil
- Place the lid on top
- Seal the edges with dough if doing traditional dum
- Cook on high heat for 2-3 minutes to create steam
- Reduce to medium-low heat
- Cook for 45-50 minutes until chicken is very tender
Step 5: Finishing (5 minutes)
- Remove from heat and let rest for 5 minutes
- Carefully open the lid
- Check that chicken is cooked through
- Baste with the cooking liquid
Serving Suggestion
Present the whole chicken on a platter with the aromatic gravy spooned around it. Garnish with fried onions, fresh mint, and serve with parathas or sheermal bread.
Pro Tips
- The depth of slits matters – they allow the marinade to penetrate
- Don’t skip the dum cooking – it’s essential for tenderness
- The whole chicken is traditionally presented to guests as a mark of respect
- Cashew and poppy seed paste give it the signature richness
- Can be partially cooked ahead of time
SEEKH KEBAB – THE CHARRED PERFECTION
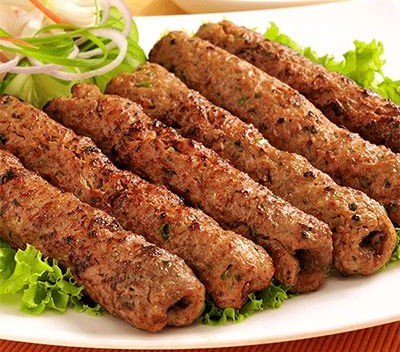
History & Significance
One of the oldest and simplest Awadhi dishes, seekh kebabs were introduced by the Mughals. Originally made from beef mince, lamb is now preferred for its soft texture. These are grilled on charcoal, giving them their distinctive smoky flavor.
Ingredients (Serves 4-6)
- 600g minced lamb or mutton
- 1 cup onions (finely chopped)
- 3 tbsp ginger-garlic paste
- 2 green chilies (finely chopped)
- 1.5 tbsp coriander powder
- 0.75 tbsp cumin powder
- 0.5 tbsp garam masala powder
- 0.25 tsp black pepper powder
- 0.5 tsp red chili powder
- 2 tbsp mint leaves (finely chopped)
- 2 tbsp coriander leaves (finely chopped)
- 1 egg
- 2 tbsp oil or ghee
- Salt to taste
- 4-5 green cardamom pods (crushed)
- Metal skewers
- Butter for basting
Method
Step 1: Prepare the Mixture (10 minutes)
- Mix minced meat with chopped onions
- Add ginger-garlic paste, green chilies
- Add all spice powders: coriander, cumin, garam masala, black pepper, red chili
- Add mint and coriander leaves
- Add salt and egg
- Mix thoroughly – the mixture should hold together when pressed
Step 2: Rest (20 minutes)
- Cover and refrigerate for 15-20 minutes
- This helps the meat bind better
Step 3: Mold on Skewers (15 minutes)
- Wet your hands with water
- Take 3-4 tbsp mixture and mold around the metal skewer
- Create a thick cylindrical shape
- Makes 8-12 kebabs
- The shape should be uniform
Step 4: Marinate (Optional, 15 minutes)
- Brush kebabs with oil
- Set aside for 15 minutes
Step 5: Grill Over Charcoal (15-20 minutes)
- Preheat charcoal grill or tandoor
- Place skewers on the grill
- Cook for 3-4 minutes on one side until slightly charred
- Rotate and cook on another side
- Continue rotating until all sides are cooked and charred
- Total cooking time: 15-20 minutes
- The outside should be charred, inside should be juicy
Step 6: Finish with Butter (2 minutes)
- In the last minute, brush with melted butter
- This adds richness
Serving Suggestion
Serve immediately with sliced onions, lemon wedges, mint chutney, and roomali roti or naan.
Pro Tips
- Don’t squeeze the meat on the skewer too tightly – it becomes dry
- Grill over medium heat, not high – you want the inside to cook
- The mince should be ground fresh, not pre-ground
- Charcoal adds the authentic smoky flavor
- Rotate frequently for even cooking
MURGH AWADHI KORMA – THE CREAMY CLASSIC
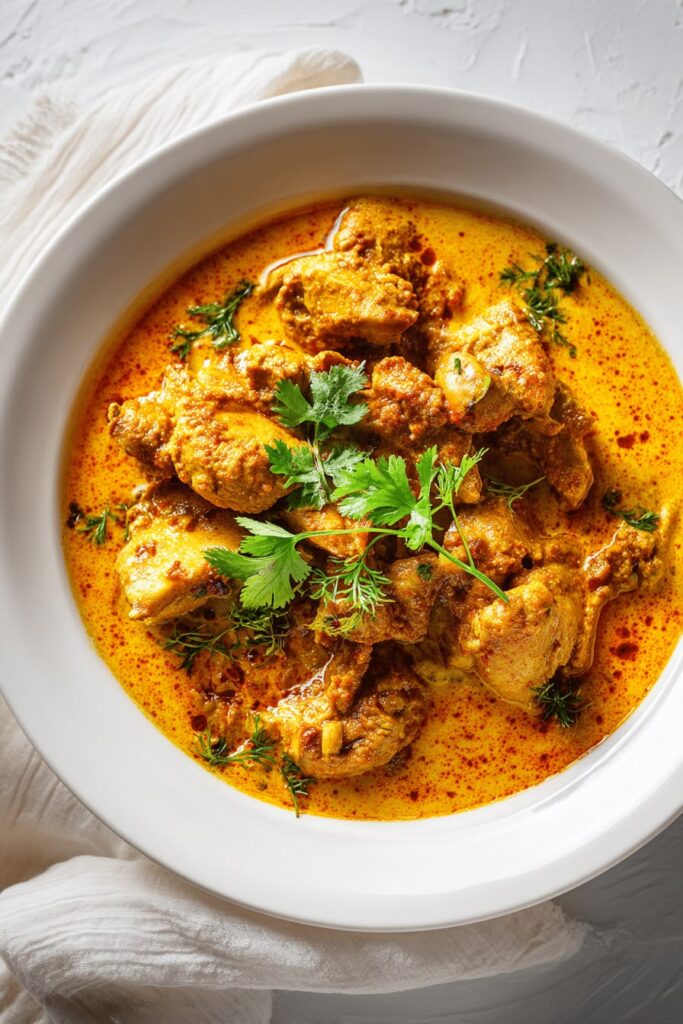
History & Significance
Murgh Awadhi Korma represents refined royal cooking. Unlike rich Mughlai kormas, Awadhi kormas are more subtle and refined, braised slowly in spiced yogurt gravy with nuts and ghee.
Ingredients (Serves 6)
- 800g chicken (cut into medium pieces)
- 1 cup yogurt
- 4 tbsp ghee
- 2 cups onions (sliced)
- 3 tbsp ginger-garlic paste
- 4-5 green cardamom pods
- 2 black cardamom pods
- 5 cloves
- 1 inch cinnamon stick
- 2 bay leaves
- 1.5 tbsp coriander powder (toasted)
- 0.5 tbsp cumin powder
- 0.5 tsp black pepper powder
- 0.25 tsp red chili powder (optional, Awadhi kormas are mild)
- 2 tbsp poppy seeds (powdered)
- 2 tbsp cashew paste
- 1 tbsp mace (javitri) pieces
- 1 tsp salt
- 0.5 cup water (or as needed)
- 2 tbsp mint leaves (finely chopped)
Method
Step 1: Prepare the Base (20 minutes)
- Heat ghee and fry onions until golden brown (careful not to burn)
- Cool slightly and grind into a smooth paste with yogurt
- This fried onion-yogurt mixture is essential for authentic Awadhi flavor
Step 2: Temper the Spices (2 minutes)
- In a heavy-bottomed pan, add remaining ghee
- Add whole spices: green cardamom, black cardamom, cloves, cinnamon, bay leaves
- Let them release their fragrance on medium heat for 1-2 minutes
- Do not let them puff up
Step 3: Cook Aromatics (5 minutes)
- Add ginger-garlic paste
- Fry on medium heat for 4-5 minutes until golden and fragrant
- This creates the flavor foundation
Step 4: Add Spice Powders (2 minutes)
- Add coriander powder (toasted) and cumin powder
- Fry for 1-2 minutes – the toasted coriander gives authentic Awadhi taste
Step 5: Add Yogurt Mixture (5 minutes)
- Lower heat to the lowest setting
- Slowly add the fried onion-yogurt paste, stirring continuously
- Stir well to prevent yogurt from curdling
- Cook on low heat for 2-3 minutes
Step 6: Season and Add Chicken (5 minutes)
- Add salt and poppy seed powder
- Add mace pieces
- Add chicken pieces carefully, coating them with the spiced gravy
- Let cook on low heat for 5 minutes
Step 7: Slow Cook (40-45 minutes)
- Cover with parchment paper and then a lid (traditional dum cooking)
- Cook on the lowest flame for 40-45 minutes
- The chicken should be very tender and the gravy should be silky
- Stir occasionally
Step 8: Finishing Touch (5 minutes)
- Add cashew paste in the last 5 minutes
- Add water if the gravy is too thick
- Add chopped mint leaves
- Adjust seasoning
Serving Suggestion
Serve with warm parathas, sheermal, or roomali roti. Garnish with fried onions (non-traditional but adds texture).
Pro Tips
- Don’t use cream or milk in Awadhi kormas – yogurt is authentic
- Toasted coriander powder is crucial
- The dum cooking method is essential – don’t skip it
- Traditional Awadhi kormas use minimal chili – the spices shine through
- Can be made a day ahead and reheated for better flavor
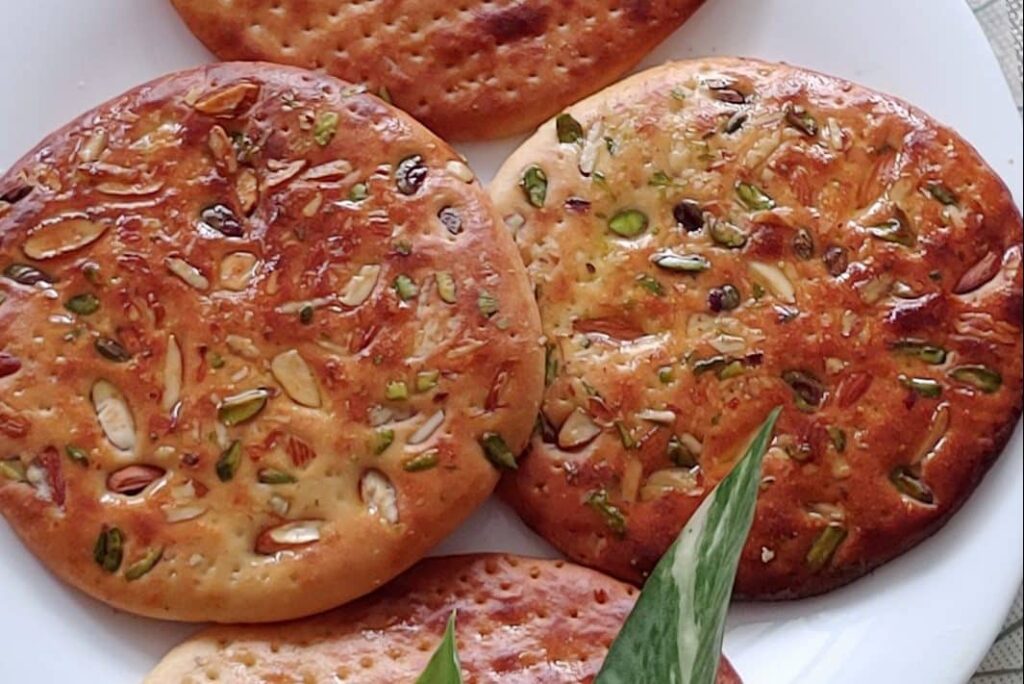
SHEERMAL – THE SAFFRON-INFUSED BREAD
Ingredients (Makes 8-10 Sheermals)
- 3 cups all-purpose flour (maida)
- 1 cup milk (warm)
- 2 tbsp yogurt
- 1 tbsp sugar
- 0.5 tsp salt
- 0.5 tsp baking powder
- 0.25 tsp baking soda
- 8-10 saffron strands
- 2 tbsp ghee (melted)
- 1 tbsp kewra water (rose water can substitute)
- 1 tsp instant yeast
- 2 tbsp milk (for brushing)
- Poppy seeds (for garnish)
Method
Step 1: Prepare the Dough (10 minutes + rising time)
- Soak saffron strands in warm milk for 10 minutes
- Add yogurt, sugar, kewra water, and instant yeast to the saffron milk
- Let rest for 5 minutes for yeast to activate
Step 2: Make the Dough (10 minutes)
- Mix flour with salt, baking powder, and baking soda
- Make a well in the center
- Pour the saffron-milk mixture and melted ghee
- Mix and knead for 8-10 minutes
- The dough should be soft but not sticky
- Add more flour if needed
Step 3: First Rising (1.5-2 hours)
- Place in a greased bowl
- Cover with a damp cloth
- Let rise in a warm place for 1.5-2 hours
- The dough should double in volume
Step 4: Shape the Sheermals (10 minutes)
- Divide dough into 8-10 equal portions
- Roll each portion into a smooth ball
- Flatten between your palms into a disc about 0.5 inch thick
- Mark with a fork or pattern
Step 5: Second Rising (30 minutes)
- Place on a greased baking tray
- Cover and let rise for 30 minutes
Step 6: Bake (15-20 minutes)
- Preheat oven to 400°F (200°C)
- Brush each sheermal with milk
- Sprinkle poppy seeds
- Bake for 12-15 minutes until light golden
- They should be soft and spongy
Step 7: Finish with Ghee (2 minutes)
- Immediately brush with melted ghee when hot
- This adds the traditional richness
Serving Suggestion
Serve warm with any Awadhi curry, especially korma or nihari.
Pro Tips
- Kewra water is essential for the authentic flavor
- Don’t overbake – sheermals should be soft
- Fresh yeast works better than instant yeast
- The saffron and kewra give it the royal Nawabi taste
Best served warm with ghee dripped on top
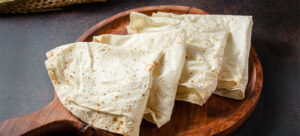
ROOMALI ROTI – THE PAPER-THIN AWADHI BREAD
History & Significance
Roomali roti, also called “handkerchief bread,” is folded to look like a handkerchief. It’s extremely thin and delicate, requiring skill to make. It’s the perfect accompaniment to rich Awadhi gravies.
Ingredients (Makes 8-10 Roomali Rotis)
- 2 cups all-purpose flour (maida)
- 0.5 cup whole wheat flour (atta)
- 1 tsp salt
- 1 tbsp ghee
- Water (as needed)
- Ghee (for cooking)
Method
Step 1: Make the Dough (10 minutes)
- Mix both flours with salt
- Add ghee and mix with fingertips to make breadcrumbs texture
- Add water gradually and knead into a soft, smooth dough
- The dough should be softer than regular roti dough
- Knead for 8-10 minutes
Step 2: Rest the Dough (30 minutes)
- Cover with a damp cloth
- Let rest for at least 30 minutes (preferably 1-2 hours)
- This makes the dough easier to stretch
Step 3: Divide and Shape (10 minutes)
- Divide into 8-10 equal portions
- Roll each into a smooth ball
- Cover with damp cloth until ready to use
Step 4: Roll Out (20 minutes)
- On a well-oiled surface, flatten one ball with your palm
- Using a rolling pin, roll very gently from the center outwards
- The roti should be extremely thin – almost transparent
- This requires practice and patience
- The circle should be about 10-12 inches in diameter
Step 5: Cook on Tawa (2-3 minutes)
- Heat a cast-iron tawa on medium-high heat
- Carefully place the thin roti on the hot tawa
- Cook for about 30 seconds – it should puff up slightly
- Flip and cook the other side for 30 seconds
- It should have brown spots but remain soft
Step 6: Fold into Handkerchief (1 minute)
- Remove from tawa
- While still hot, fold into quarters to make a handkerchief shape
- Brush with ghee
Serving Suggestion
Serve immediately with any Awadhi curry. The thin texture makes it perfect for soaking up the gravy.
Pro Tips
- The key to roomali roti is rolling it very thin – it should be almost transparent
- Use an oiled surface rather than flour for rolling
- A cast-iron tawa is best
- Practice makes perfect – your first few might not be perfect
- If the roti cracks while rolling, dust with a bit of flour and continue gently
- Best served immediately while warm and soft
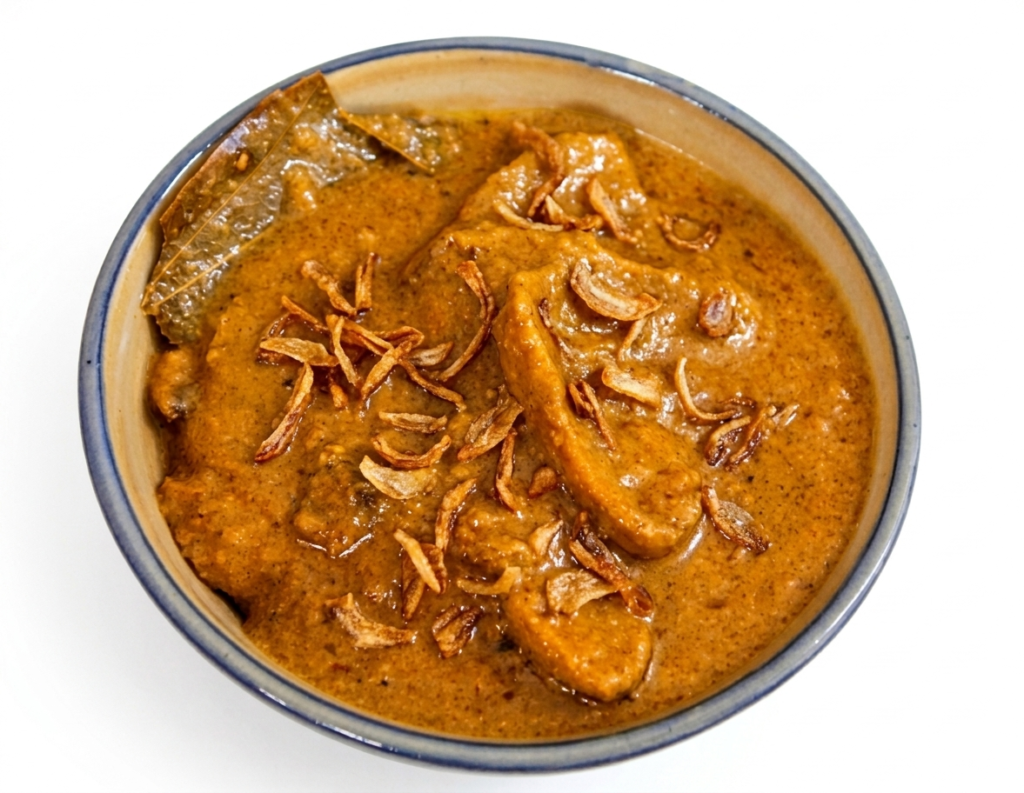
ARBI KA KORMA – THE VEGETARIAN ROYAL CURRY
History & Significance
For vegetarians in Awadhi cuisine, arbi (colocasia/taro root) ka korma is a classic. The arbi loses its sliminess through frying and acquires a meaty texture when braised in spiced yogurt gravy, making it a satisfying vegetarian korma.
Ingredients (Serves 4-6)
- 600g arbi (colocasia/taro root)
- 4 tbsp ghee
- 1.5 cups onions (sliced)
- 2.5 tbsp ginger-garlic paste
- 0.75 cup yogurt
- 1.5 tbsp coriander powder (toasted)
- 0.5 tbsp cumin powder
- 0.5 tsp black pepper powder
- 1 tbsp poppy seeds (powdered)
- 1 tbsp cashew paste
- 4-5 green cardamom pods
- 2-3 black cardamom pods
- 4-5 cloves
- 1 inch cinnamon stick
- 1 tbsp mace (javitri) pieces
- 1.5 tsp salt
- 0.5 cup water
- 2 tbsp mint leaves (finely chopped)
- Oil for deep frying arbi
Method
Step 1: Prepare the Arbi (20 minutes)
- Peel the arbi and cut into halves lengthwise
- Soak in water for 5 minutes to reduce sliminess
- Pat dry completely
- Deep fry the arbi halves in hot oil until golden and cooked through
- Remove and set aside
- (Note: Some prefer boiling instead of frying for a lighter version)
Step 2: Prepare the Base (20 minutes)
- Heat ghee and fry onions until deeply golden brown
- Cool and grind into a paste with ginger-garlic paste
- Mix this paste with yogurt
Step 3: Temper Whole Spices (2 minutes)
- In a heavy pan, add remaining ghee
- Add green cardamom, black cardamom, cloves, cinnamon, mace
- Let them release fragrance for 1-2 minutes
Step 4: Cook the Aromatics (4-5 minutes)
- Add ginger-garlic paste
- Fry on medium heat for 4-5 minutes until golden
Step 5: Add Spice Powders (2 minutes)
- Add toasted coriander powder and cumin powder
- Fry for 1-2 minutes
Step 6: Temper the Yogurt (3-4 minutes)
- Lower heat to the lowest setting
- Slowly add the onion-yogurt paste, stirring continuously
- Stir well to prevent curdling
- Cook for 2-3 minutes
Step 7: Add Arbi and Season (2 minutes)
- Add salt
- Add poppy seed powder and cashew paste
- Gently add the fried arbi pieces
- Coat them well with the spiced gravy
- Add water if the sauce is too thick
Step 8: Slow Cook (20-25 minutes)
- Cover the pan with a lid
- Cook on low heat for 20-25 minutes
- Stir occasionally
- The gravy should be rich and velvety
Step 9: Finishing (2 minutes)
- Add chopped mint leaves
- Adjust seasoning
- The arbi should be very tender
Serving Suggestion
Serve with warm parathas, sheermal, or any other Awadhi bread. Can be garnished with fried onions.
Pro Tips
- Traditional method uses deep-fried arbi for better texture
- Don’t skip toasting the coriander powder
- The poppy seed and cashew paste are essential for the signature richness
- The arbi should be so tender that it barely holds its shape
- This dish can be made a day ahead
- Some cooks add a pinch of turmeric for color, though traditionally it’s not used
GENERAL TIPS FOR AUTHENTIC AWADHI COOKING
- Use Ghee: Most authentic Awadhi dishes use ghee, not oil. It adds the signature rich flavor.
- Toast Your Spices: Always toast whole spices before using to release their essential oils.
- Dum Pukht (Slow Cooking): The signature technique of Awadhi cuisine. Seal the pot and cook on low heat to allow flavors to infuse.
- Careful with Yogurt: When adding yogurt to hot oil, do it slowly on the lowest heat to prevent curdling.
- Marinate Properly: Give meat enough time to absorb the flavors of the spices and marinades.
- Balance Your Spices: Awadhi food is subtle. Use quality spices in balanced proportions rather than excessive heat.
- Saffron and Kewra: These aromatic additions are essential for authentic Nawabi flavor. Don’t skip them.
- Fresh Herbs: Mint and coriander leaves should be added at the end to retain their flavor.
- Use a Mortar and Pestle: For grinding spices fresh rather than using pre-ground ones.
- Patience: Authentic Awadhi cooking cannot be rushed. Slow cooking is the secret to deep, complex flavors.
CONCLUSION
These 10 authentic Awadhi recipes represent centuries of royal culinary tradition from the kitchens of Lucknow’s Nawabs. Each dish tells a story of skill, patience, and refinement. While recreating these dishes at home requires time and attention to detail, the result is worth every effort. The flavors of Awadhi cuisine are subtle yet complex, aromatic yet balanced—a true testament to the culinary artistry of the region.
Enjoy bringing the taste of royal Lucknow to your table!
